Baked Shotgun Shells
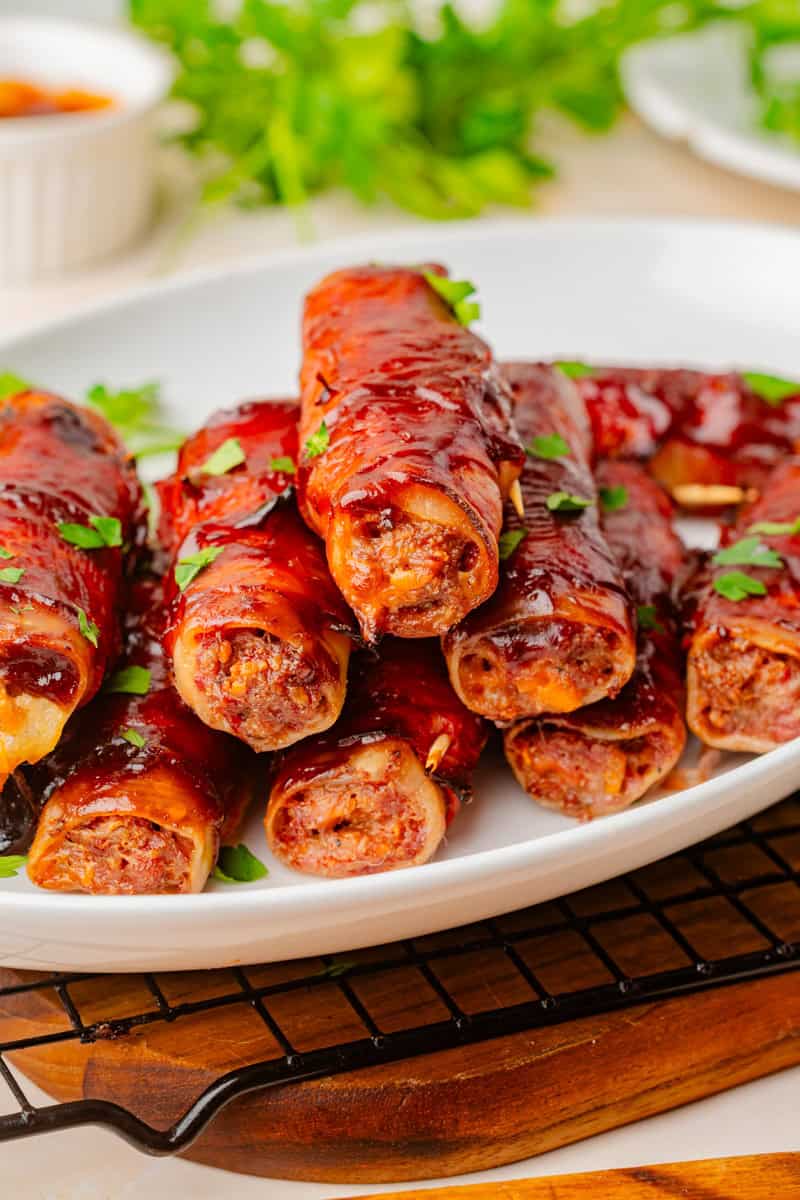
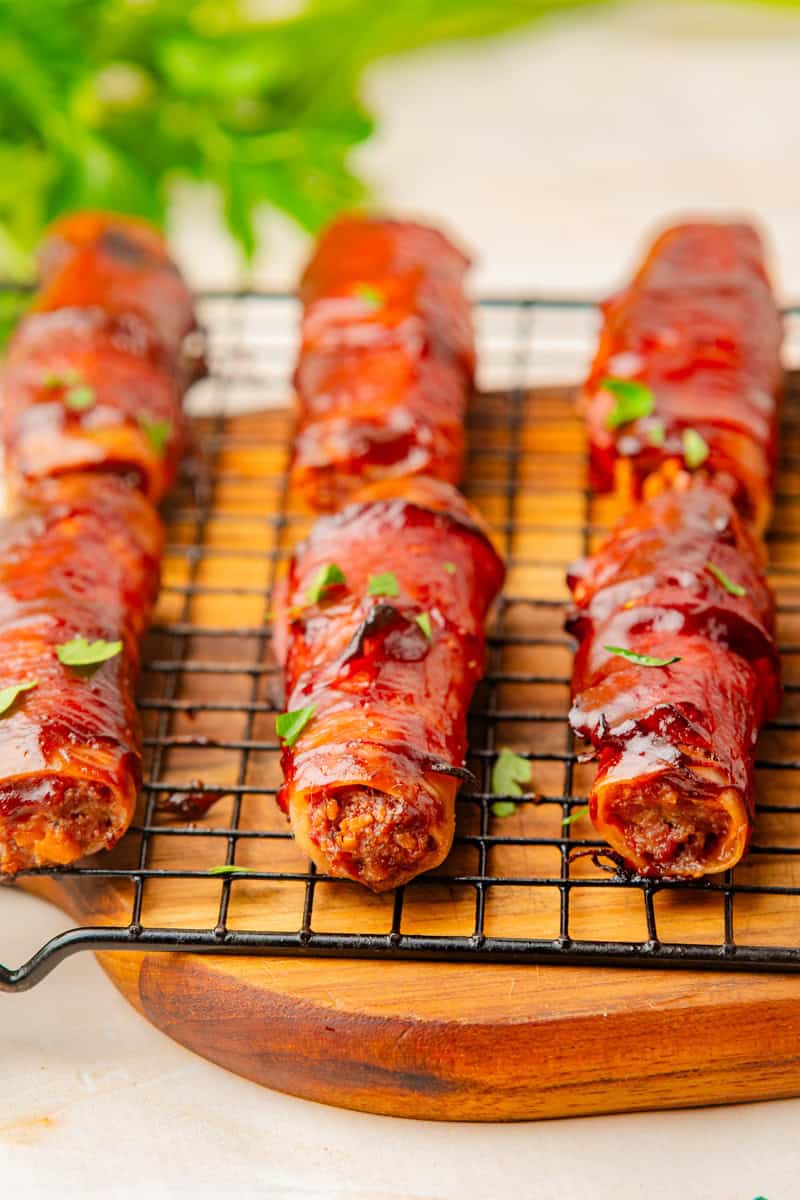
My baked shotgun shells feature pasta stuffed with cheesy beef wrapped in crunchy bacon and topped with sticky sweet BBQ sauce. Most versions require boiling pasta or using a smoker for hours, but ours are made right in the oven!
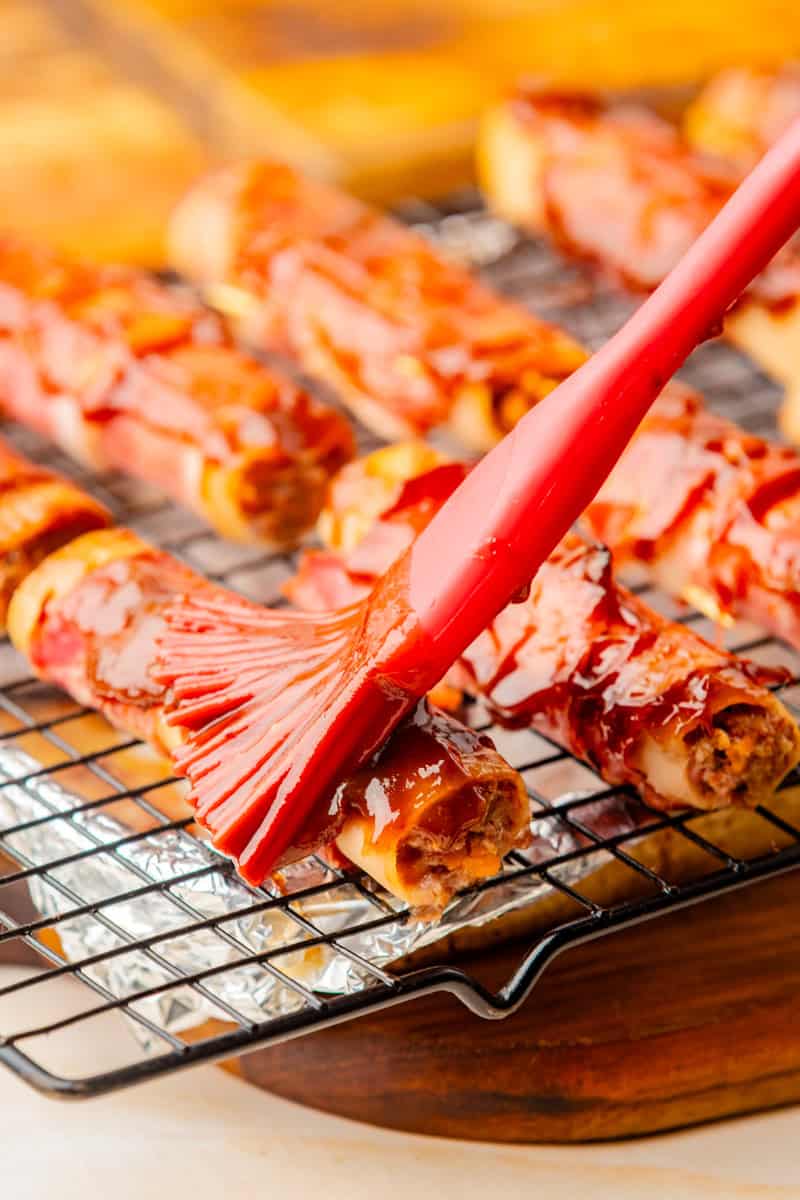
These shotgun shells are sure to make you the most popular guest at the cookout. They look like they took hours but really only require about 30 minutes of effort. Best of all you can eve prep them the day before. You don't even have to precook the pasta. It plumps up from the inside out using only the meat's own moisture. They're also one of our go to game day appetizers. We love serving them alongside dishes like baked beans, mac and cheese, armadillo eggs, and Mexican street corn.
Why Our Recipe Is the Best: A Sprinkle of Food Science
- We Use a Wire Rack: This allows the fat to drain so the bacon is crispy not rubbery or greasy.
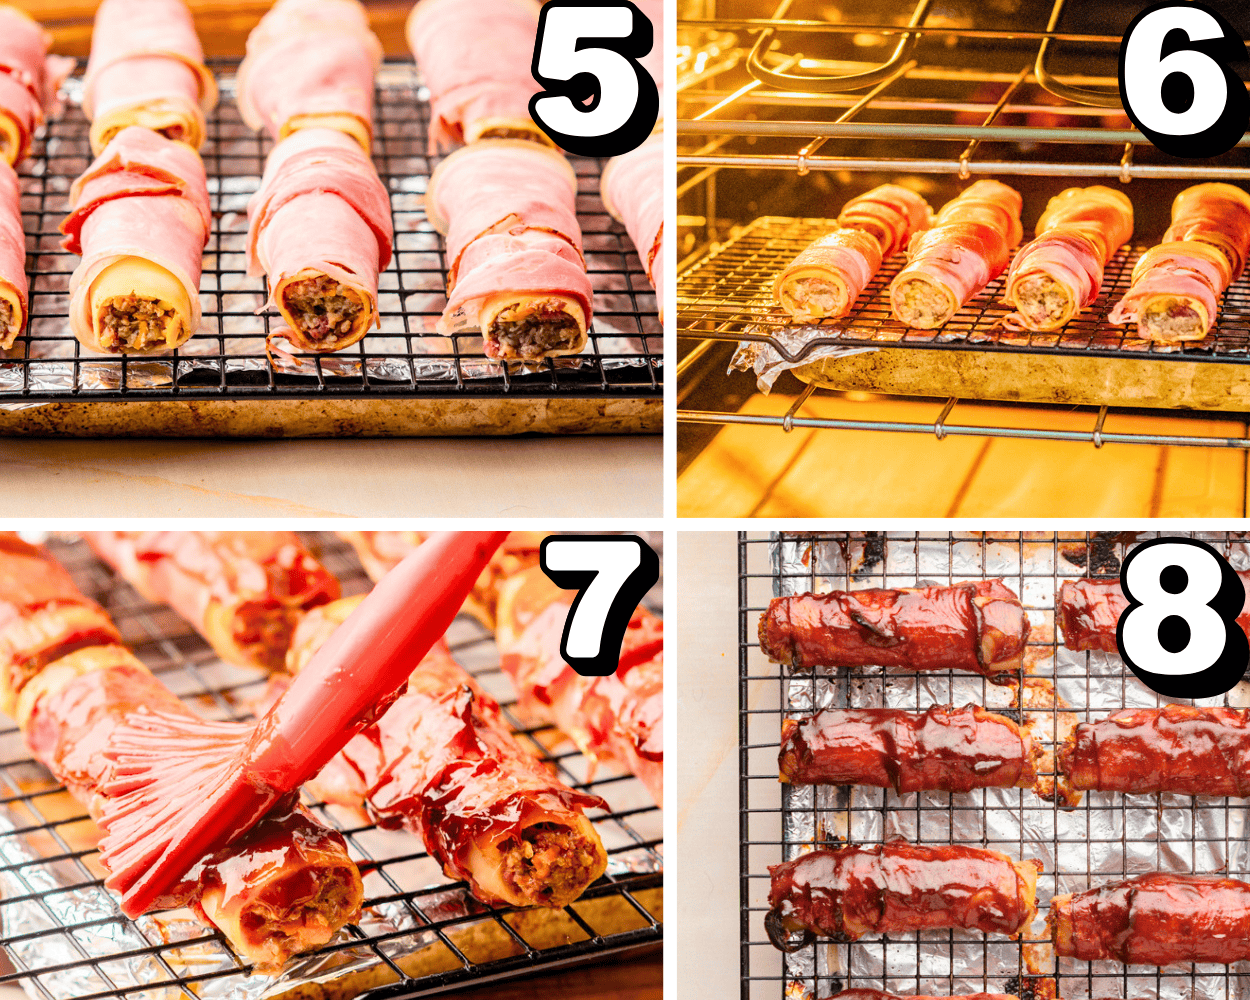
- We Cook At 2 Different Temperatures: Starting at 300 degrees allows the bacon fat to render and prevents the beef from drying out. Then we crank the heat up at the end to crisp up the bacon.
- We Add the BBQ Sauce Last: Most BBQ sauces are high in sugar and can quickly burn. Adding it towards the end prevent this.
Ingredient Notes and Shopping Tips
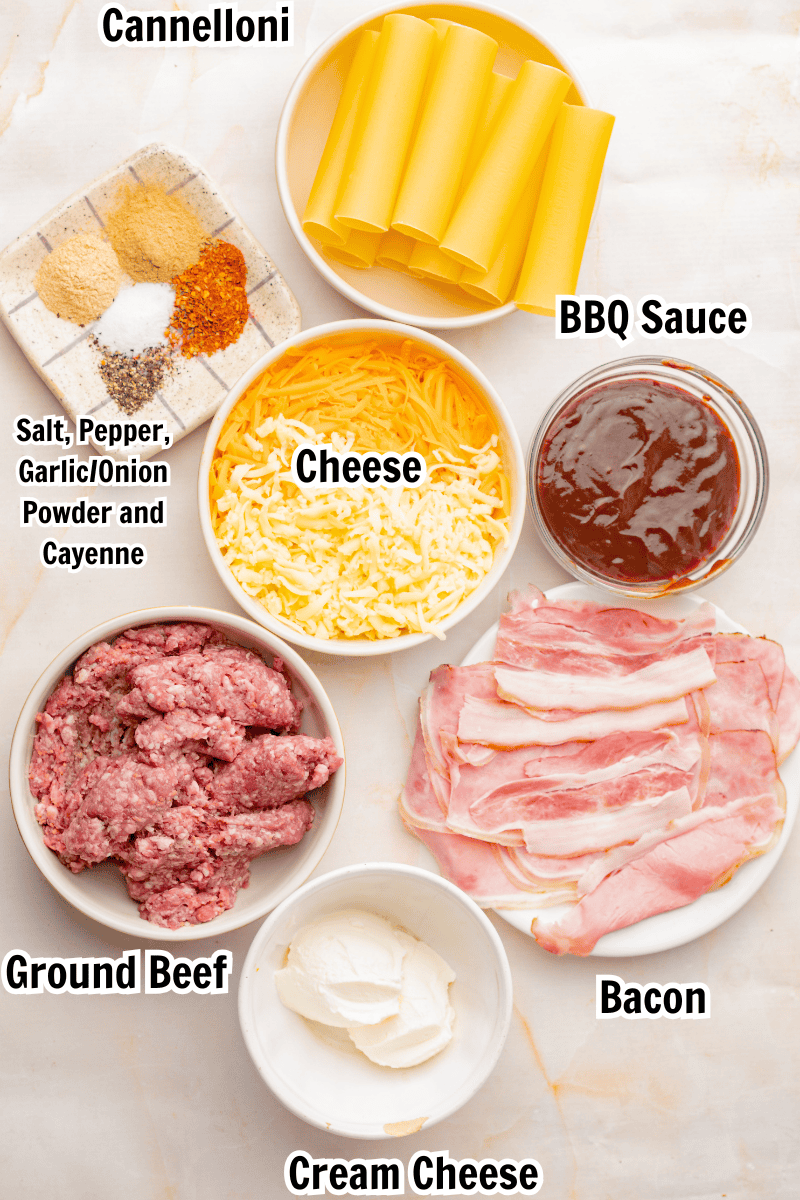
- Ground Beef: We like using 90% lean so the end product isn't overly greasy. You could also use half beef and half sausage if you'd like.
- Pasta: I used cannelloni which is smooth and easier to fill. You can also use manicotti which has ridges and will hold a little more filling. You may not get quite as many if you use it instead.
- Cheese: Shred your own cheese if at all possible. Pre-shredded varieties contain starch which will not melt as smoothly. I used sharp cheddar and mozzarella but any good melting cheese can be substituted such as pepper jack, Monterrey jack, ect.
- Cream Cheese: Allow to soften at room temp. for around an hour to help it incorporate smoothly.
- Bacon: Do not use thick cut bacon. It will take longer to cook and will not get as crispy.
- BBQ Sauce: We like Sweet Baby Ray's.
- Salt: If your rub is very salty leave out the added salt.
Krystle's Tips Steal My Culinary School Secrets
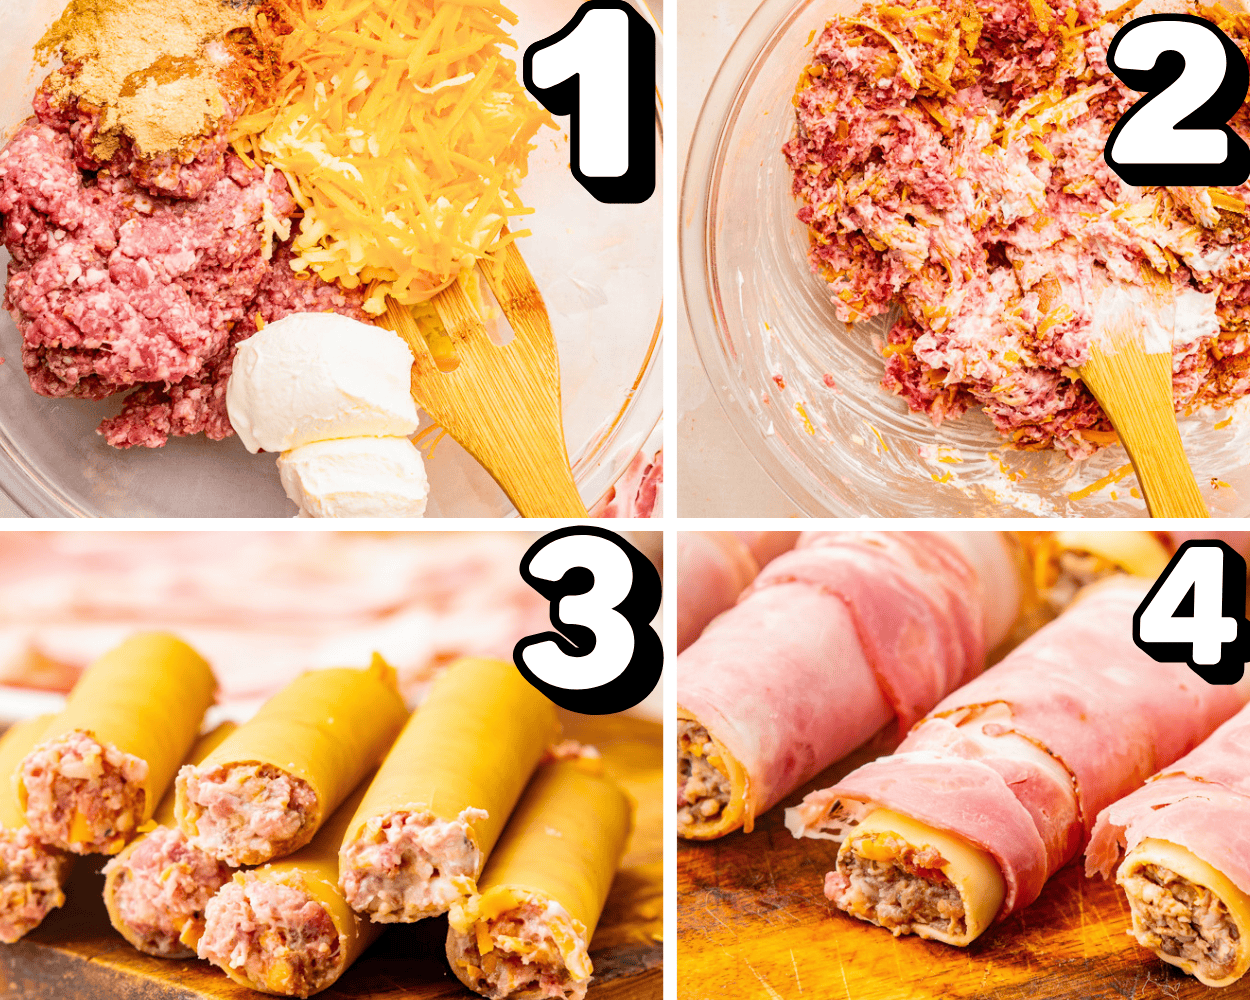
- Do Not Skip the Rest Time: The pasta will turn out dry. It needs a few hours of contact with the filling to help it soften.
- Don't Overmix: Overmixing can make the ground beef tough. Mix until it just comes together.
Yes! Smoke at 275 degrees for 60-70 minutes. Brush on BBQ and continue to cook for another 1020 minutes.
More BBQ Recipes You'll Love
Still Hungry? Follow Baking Beauty on Pinterest, and Instagram so you don’t miss a recipe. Subscribe to our newsletter too.
📖 Recipe
Best Oven Baked Shotgun Shells
Want to Save This Recipe?
Enter your email & I'll send it to your inbox. Plus, get great new recipes from me every week!
Ingredients
- 18 Cannelloni or Manicotti Shells
- 1 Pound Ground Beef 90% Lean
- 1 Cup Cheese Freshly Shredded, I used Sharp Cheddar and Mozzarella
- 4 Ounces Cream Cheese Softened
- 2 Teaspoons Worcestershire Sauce
- 2 Tablespoons BBQ Dry Rub
- 1 Teaspoon Garlic Powder
- 1 Teaspoon Onion Powder
- ½ Teaspoon Freshly Ground Black Pepper
- ¼ Teaspoon Salt If Your Rub Is Very Salty, Leave This Out
- 18 Slices Bacon Not Thick Cut
- ½ Cup BBQ Sauce Plus Extra For Serving
Instructions
- In a large bowl, combine ground beef, cheese, cream cheese, Worcestershire Sauce, BBQ rub, garlic powder, onion powder, salt, and black pepper.
- Use a piping or Ziploc bag to fill each dry pasta shell with the meat mixture.
- Wrap one slice of bacon around beach pasta tube overlapping slightly. Secure with toothpicks.
- Place on a wire rack set on top of a foil lined rimmed baking sheet. Cover and refrigerate for at least 4 hours up to 12 hours.
- Remove from the refrigerator about 20–30 minutes before baking. Preheat oven to 300 ℉.
- Bake for 45 minutes.
- Brush each shell with barbecue sauce. Bake for around 22-25 more minutes or until filling is cooked through to 165℉ and the pasta is tender.
- Increase the oven temperature to 425°F and cook for 5-8 more minutes to crisp up the bacon. You can also broil them for 1-2 minutes if desired.
- Rest for 5-10 minutes before enjoying.
Notes
Nutrition